This article will walk you through all the setting for Outlook 2010/2013 so you can check your existing account if configured correctly.
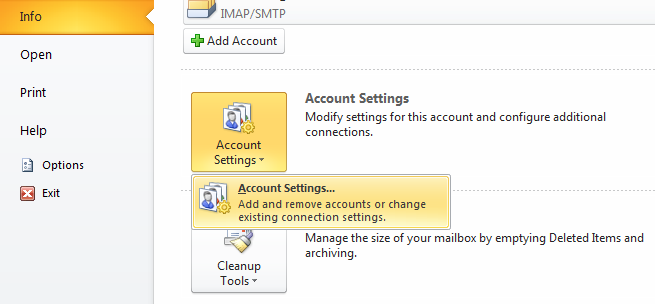
To view you existing settings Open Microsoft Outlook 2010, then click on File > Info > Account Settings > select account settings from the box that appears.
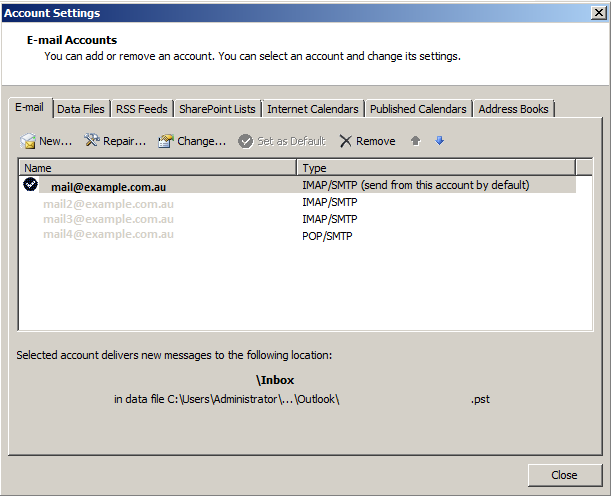
A new account settings page will load, double click on your email address you want to check settings on.
The incoming mail server should be mail.cheaperdomains.com.au and the outgoing mail server should be smtp.cheaperdomains.com.au.
TIP: Your email address is usually the same as your User Name.You can also verify you account password with our webmail facility at https://webmail.cheaperdomains.com.au if you can login to the account with your email address and password then you definitely have the correct details.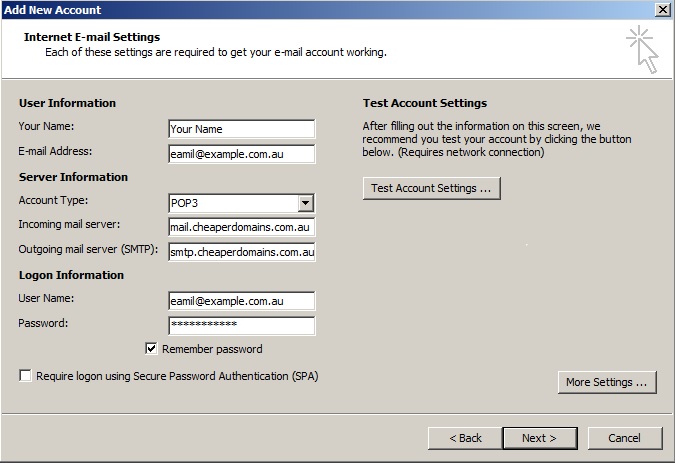
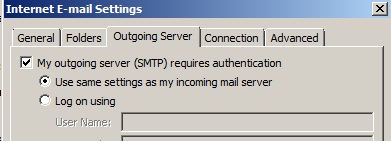
Click More Settings... in the lower right, and click on the Outgoing Server tab. The settings should be as per the image below, with My Outgoing Server (SMTP) Requires Authentication ticked and the bullet in the first option, Use Same settings as my incoming mail server.
Next Click on the Advanced tab and select SSL from the two drop down boxes labelled 'use the following type of encrypted connection'. Just below you will see a box labelled Outgoing mail server (SMTP): with 25 in the box, change this number to 465. When done, it should look like the screenshot below.
IMAP Only: If you selected the account type as IMAP, down the bottom of the page you will see a box labelled Root folder path type in Inbox as per the screenshot below. This will ensure all your special folders appear in the correct location in the outlook folder tree. If you are using POP or POP3 this step isn't relevant.
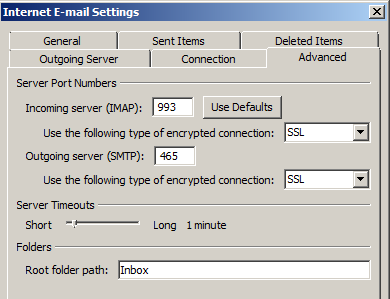
Notes: You don't have to select the number for the incoming mail server as outlook will figure it out correctly for itself once you select SSL. However if you want to re-assure yourself it will be either 993 or 995 depending on your account type. If the incoming mail server is not 993 or 995, then you most likely have not enabled/selected SSL for the incoming mail server.
The Root folder path only appears if you have chosen to set the account type up as IMAP.
Click OK when done and test the account settings. Provided you have the correct email address and password your account should both send and receive in a few seconds and the process is complete.
Note: If you can't find an answer to your problem click Here to open a support ticket (requires log in).

