This guide is suitable for phones such as
If you are using an iPhone 5 or below, please click this link
You will need the following...
1. Go to the Main Menu (The quickest way to do this is to press the Home button which is the only button on the front of the device or Swipe Up from the bottom of the screen when no button is present)
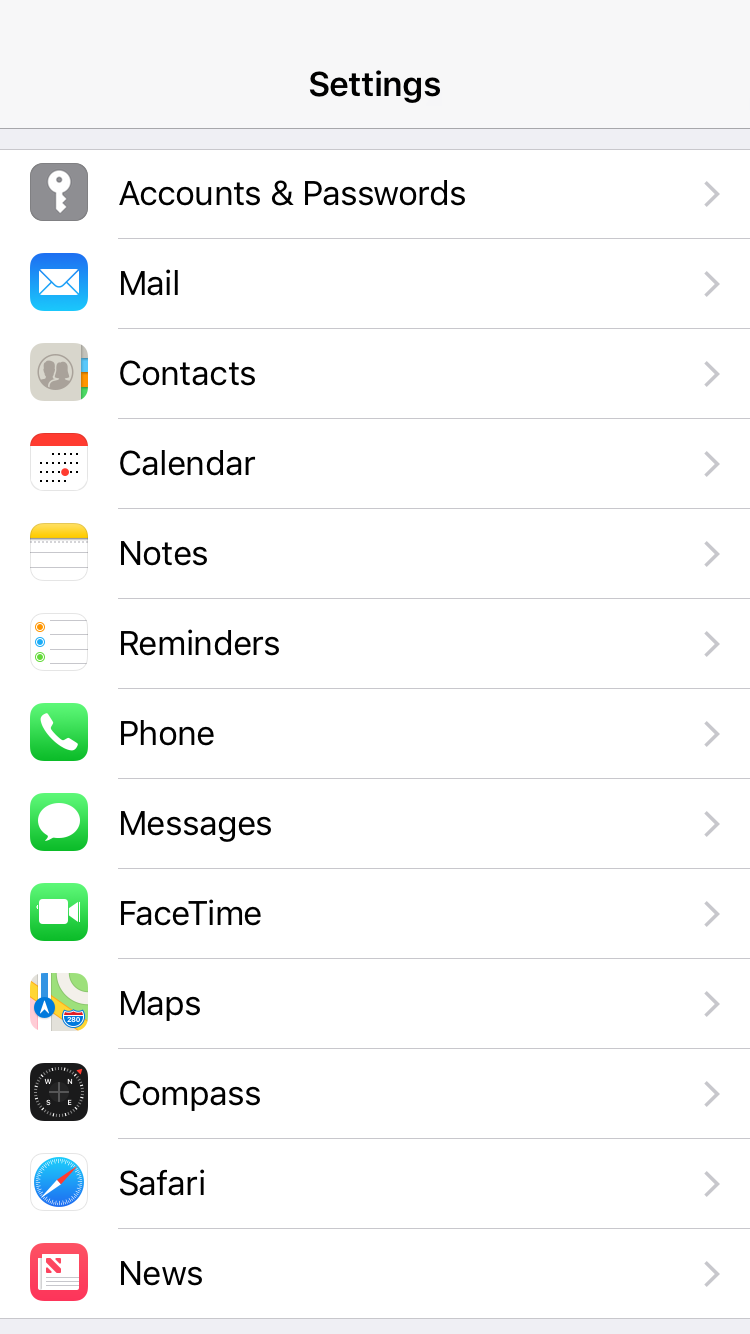
2. Select Settings which should look like the image below

3. Scroll down and tap on (menu selection changes with operating system version)
Accounts & Passwords (iOS11)
Passwords and Accounts (iOS12)
Passwords & Accounts (iOS13)
Mail (iOS14)
4. Tap on Add Account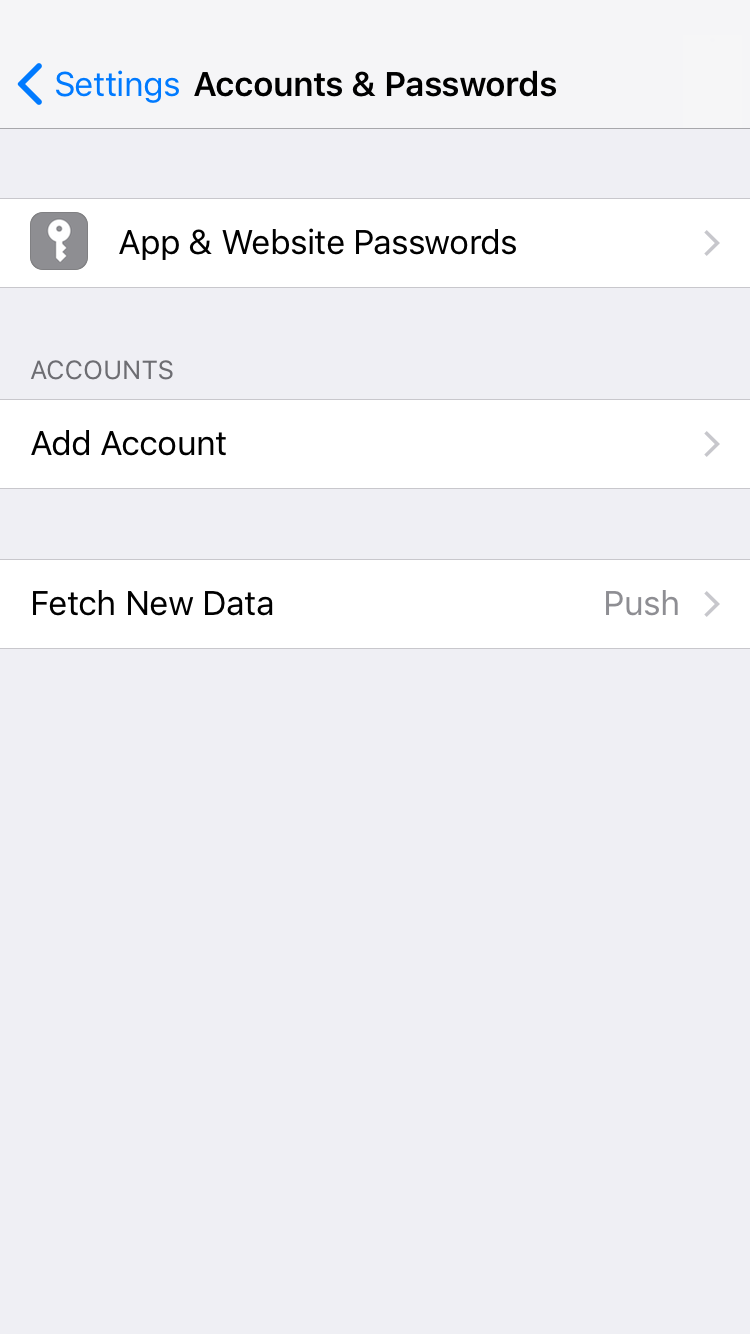
5. Tap on Other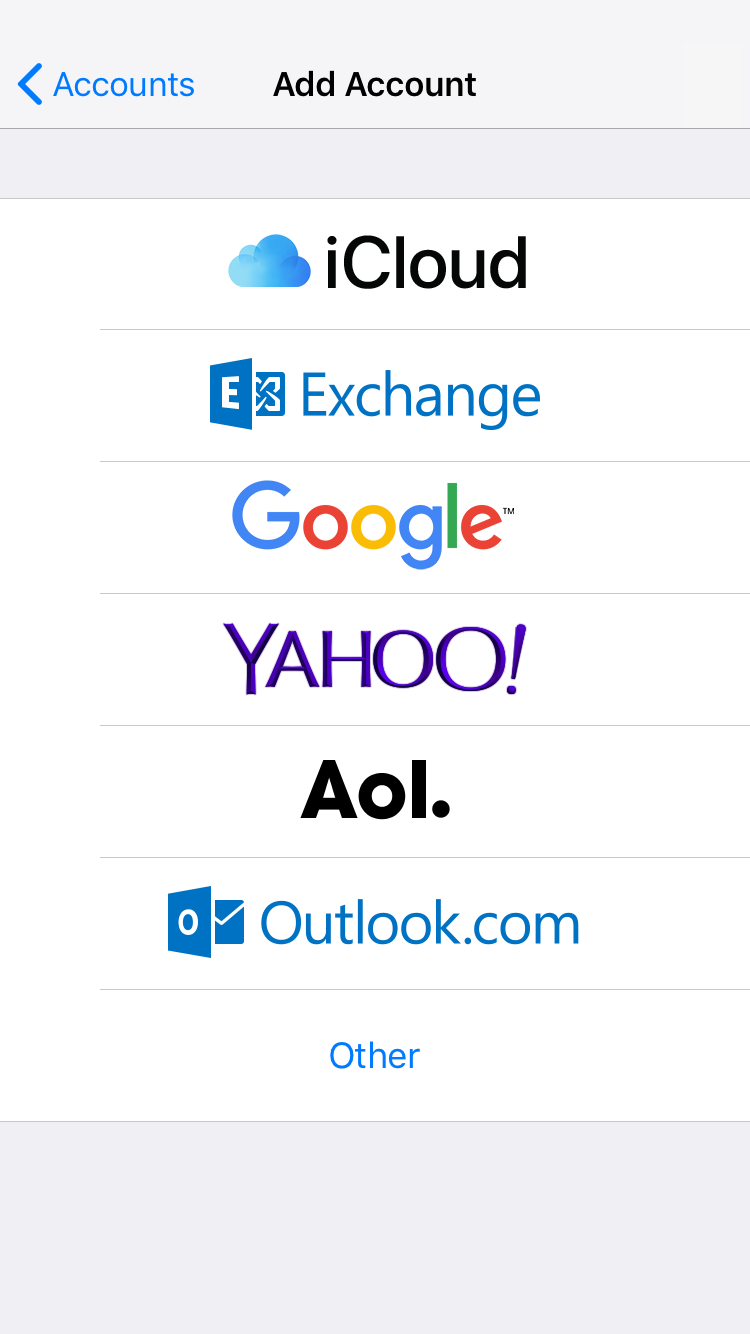
6. Tap on Add Mail Account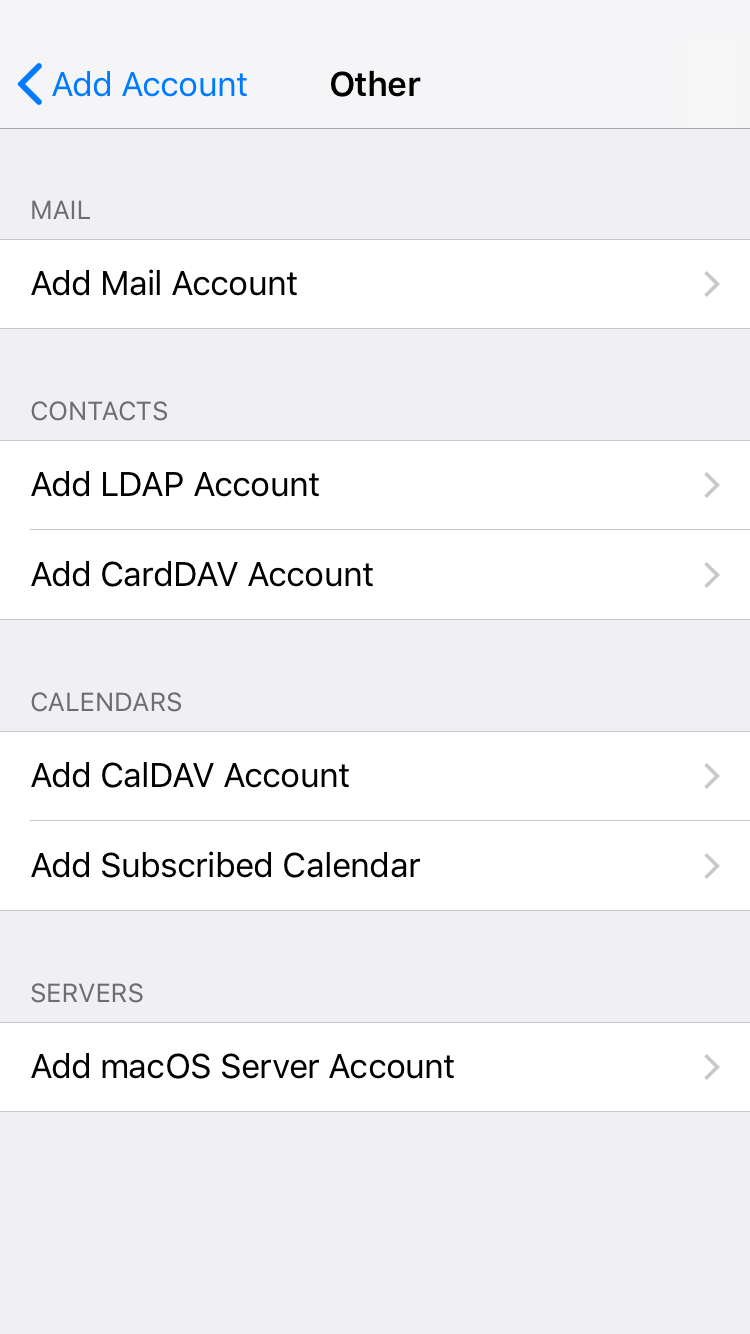
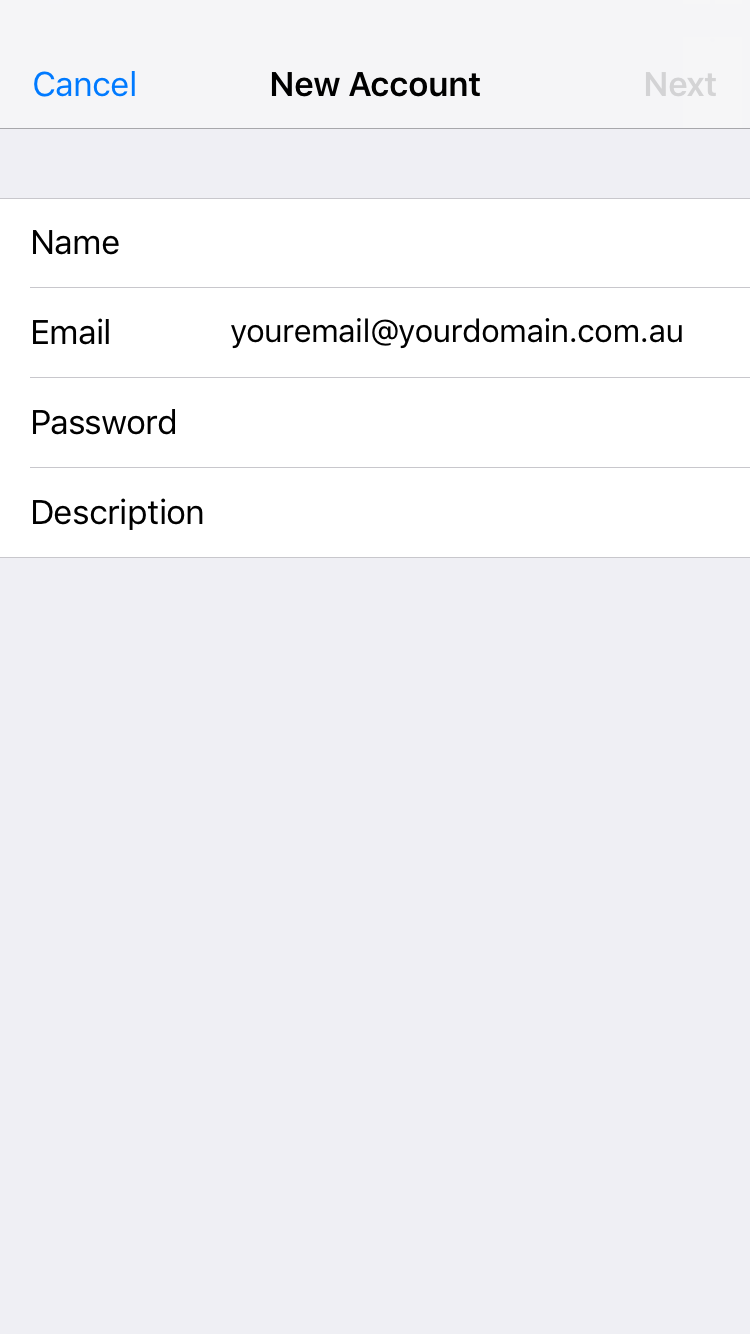
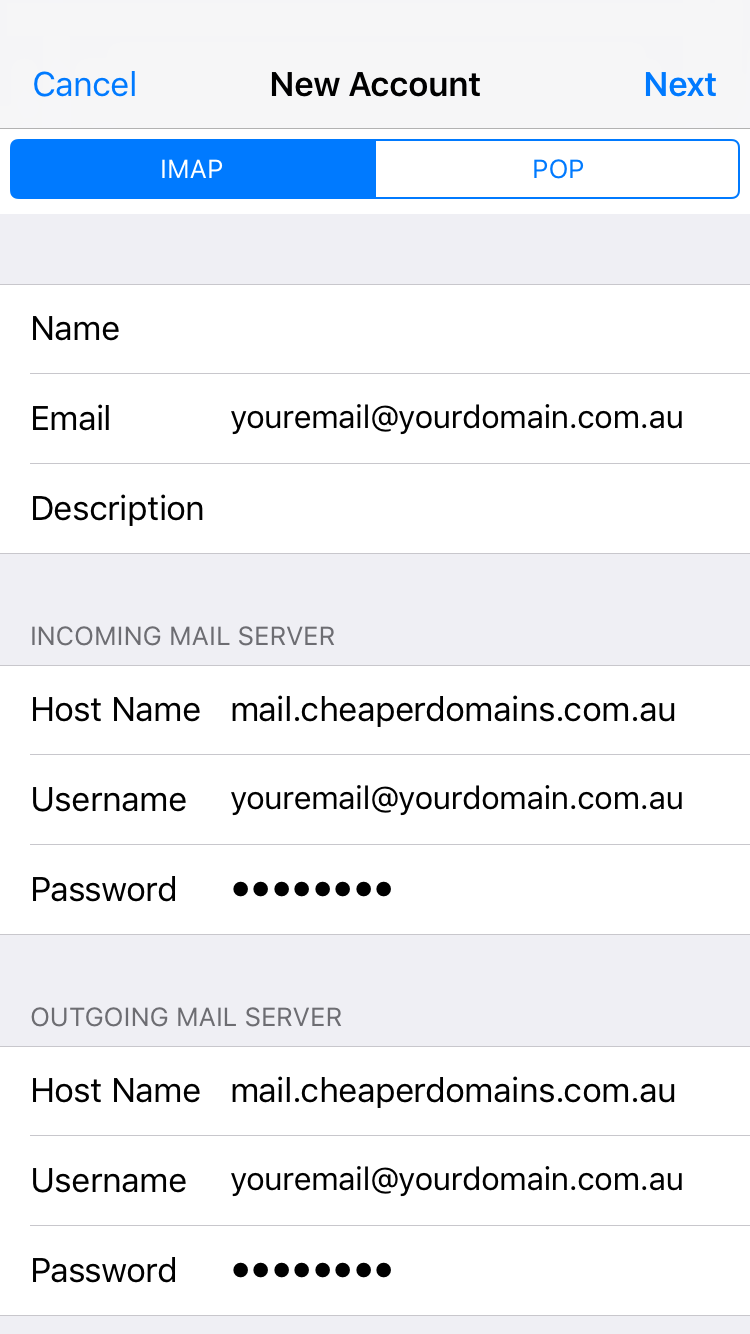
7. You'll then be asked for the following information then tap Next
Incoming Mail Server
Outgoing Mail Server
Troubleshooting
A) Typos with the small keys on many mobile devices are not uncommon and are a regular issue when setting up accounts.
B) The User Name in both sections must be the same as the one you assigned on the server, typically it will be in lower case.
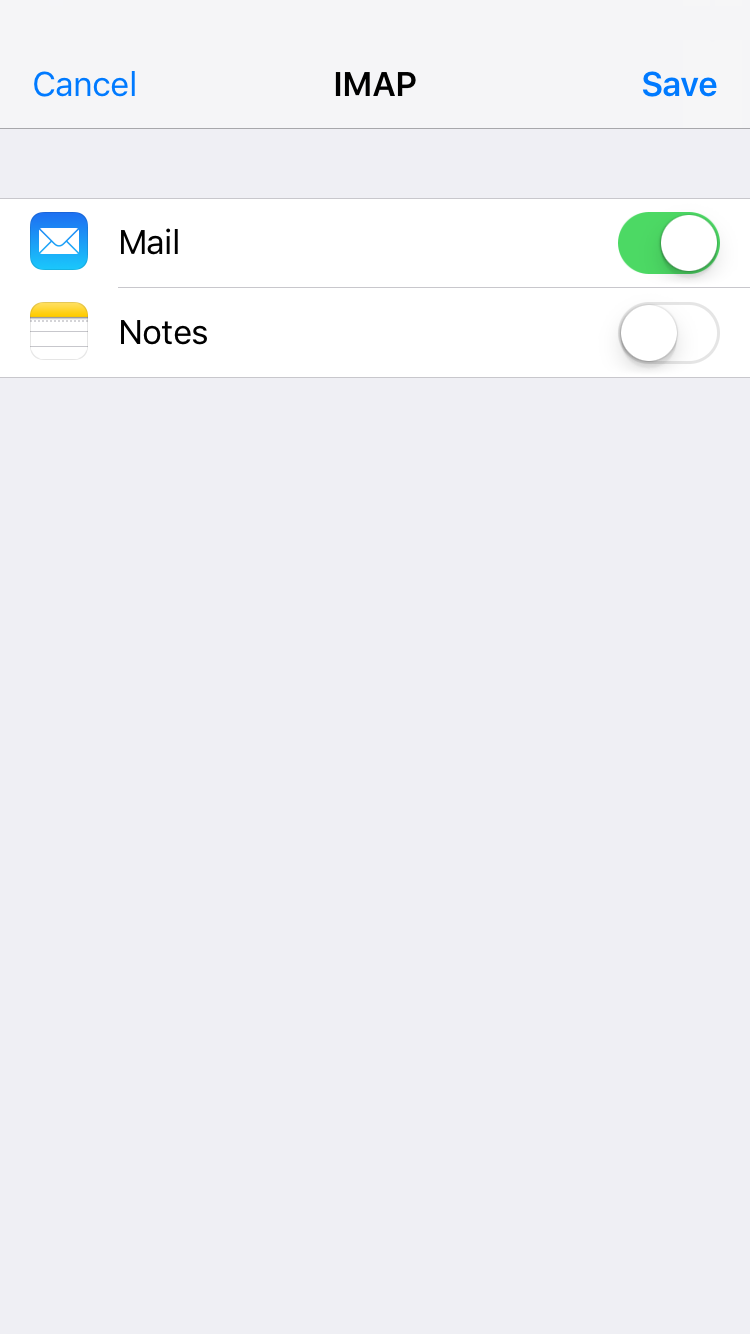
C) Get back into the account and scroll to the bottom of that page and click Advanced. Check the following information on this page:
Incoming Settings
Use SSL: On
Server Port: 993
Outgoing Settings
Use SSL: On
Authentication: Password
Server Port: 587
Note: If you can't find an answer to your problem click Here to open a support ticket (requires log in).

