You will need the following...
1. Open Thunderbird. If this is the first time you have used Thunderbird you will see a screen like the one below. (skip to step 4)
2. Click on Tools menu up the top and select Account Settings
3. Click on Account Actions in the lower left corner and select Add Mail Account...
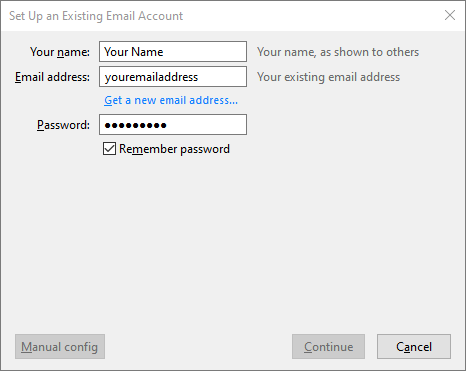
4. A page will appear like the screenshot below. Enter your name, email address in lower case and email password as you created them on the server. Then click Continue.
5. When you click continue you will see a page like this. Click the button Manual Config.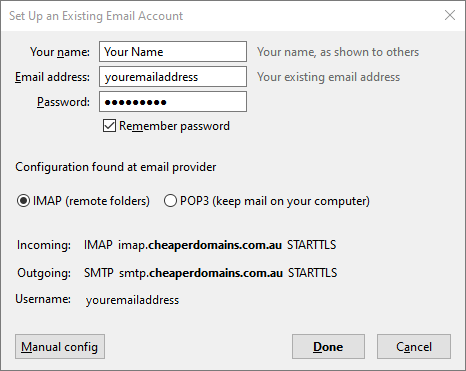
6. The box will expand and you will need to make sure the settings below are applied.
Incoming Settings
Account Type: IMAP
Server Hostname: mail.cheaperdomains.com.au
Port: 993
SSL: SSL/TLS
Authentication: Normal Password
Outgoing Settings
Server Hostname: mail.cheaperdomains.com.au
Port: 465
SSL: SSL/TLS
Authentication: Normal Password
7. Lastly in the Username field, be sure it has your full email address for Incoming & Outgoing.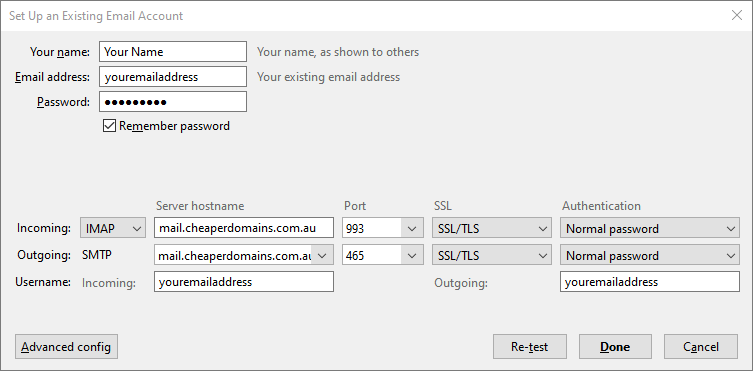
Note: Thunderbird will automatically select the correct ports when you select SSL/TLS.
8. Click Done and the account will be created.
Note: If you can't find an answer to your problem click Here to open a support ticket (requires log in).

